Tuesdays with Dorie

Standard

I am very excited to have joined the Tuesdays with Dorie (TWD) group.  Our plan is to bake through the entire book Baking With Julia – two recipes per month that the group chooses.   It is extremely comforting to know that we are embarking on this delicious journey together.  I am totally thankful for the support of this group – especially since I am not only a novice to the world of blogging, but to baking as well.  I know that there will be many “firsts” in my future, and I hope you will drop in and join me from time to time.  I missed the first recipe that the group baked- a scrumptious pair of White Loaves –but I definitely plan on baking it soon. The breads looked so inviting! I need to bake some for my family ASAP!   Stay tuned for our next recipe – Chocolate Truffle Tartlets, an intense chocolate-y experience – perfect for Valentine’s Day! If you are a chocoholic like me (chocolate is my weakness- I need some everyday), I know that you will love this treat.  Chocolate pastry shell, bittersweet filling and crunchy bites of white and milk chocolate and crunchy amaretti within a tartlet that will wow your friends and loved ones!

Hungarian Shortbread

Standard

Our Tuesdays with Dorrie recipe, Hungarian Shortbread, was a big hit in our house.  We are all trying to watch our weight and are trying to eliminate dairy as much as possible.  This recipe calls for a whole pound of butter!  Yes, you read correctly- 4 sticks of butter – and at first I considered either not baking it or using a substitute for the butter.  (If anyone reading this has some good alternatives to butter, please let me know!)  Well, I decided that I wanted to be true to the recipe, so I bit the butter bullet and followed the recipe’s ingredients exactly. It was worth it!!  To find this decadent recipe in its entirety, please check out this week’s hosts Lynette (One Small Kitchen) and Cher (The Not So Exciting Adventures of a Dabbler). It can also be found in the book Baking with Julia, by Dorie Greenspan where you can find the recipe on pages 327-328.

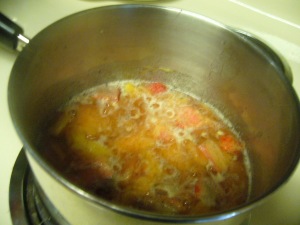
This recipe calls a layer of rhubarb jam spread between two layers of grated dough. The rhubarb jam was simple to prepare and created a wonderful aroma in the house.  I was getting psyched to make the dough.


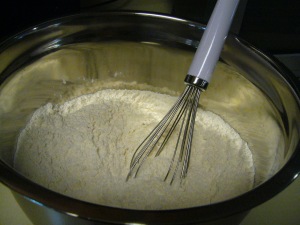
The dough was also simple to prepare. Dry ingredients were whisked together.

Our pound of butter was beaten until fluffy and then egg yolks and sugar were added to the mix.

The dry ingredients were slowly incorporated, and then the dough was turned out onto a work surface, divided in half, and the two balls were then wrapped in plastic and frozen.

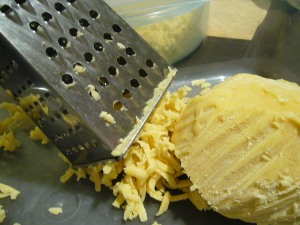
The recipe called for a brilliant technique of chilling the dough in the freezer and then grating it directly into the 9 x 12-inch pan.  It was not easy at first grating the dough with my box grater, but as the dough warmed up a bit in my hand, it got easier and was kind of fun.

[Note: The dough should be frozen for thirty minutes. If longer, such as overnight, just let the dough thaw a bit in the freezer. My dough was in the freezer for about 4 hours.]

I took the advice from some of the other bakers in our group.  I lined the pan with parchment paper, and then baked the first layer of grated dough for 15 minutes before spreading on the room temperature rhubarb jam. Then a second layer of grated dough is lightly distributed over the rhubarb layer.


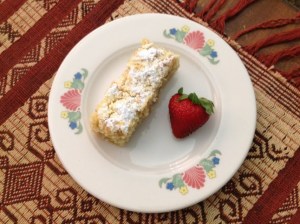
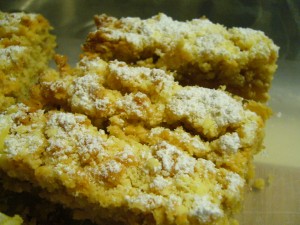
Bake the shortbread in a 350 degree oven for 40 minutes or until golden brown. As soon as it is removed from the oven, dust the top with a liberal amount of confectioner’s sugar.

Cool completely before cutting the shortbread into bars.

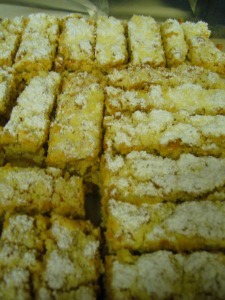
These shortbread cookies looked so professional and tasted divine!  Buttery flavor, crumbly texture, and great with a cup of coffee, of course!

My son is graduating from college this weekend.  I am so proud of him and excited for him to begin his life journey!  I froze half of the bars so that they would be perfect for him when he gets home.  I am happy that he will be here to share the wealth of the goodies that will be baked in the next few months before he heads off to graduate school.  (P.S. Happy Birthday Jesse!)

Lemon Loaf Cake

Standard


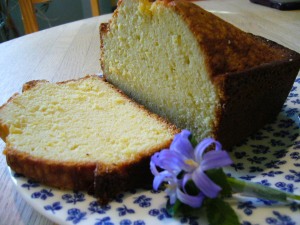
For our Tuesdays with Dorie: Baking with Julia, group, we all baked a Lemon Loaf Cake. The recipe for this wonderful cake will be available on the blogs of our host bakers Michelle of The Beauty of Life and Truc of Treats.  I also recommend purchasing the book Baking with Julia, by Dorie Greenspan where you can find the recipe on pages 252-253.


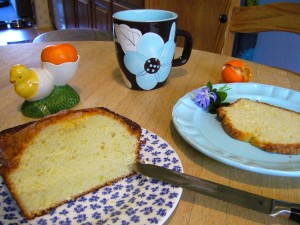
I thoroughly enjoyed baking and eating this delicious lemon loaf cake.  The texture was similar to a pound cake and the lemony flavor was perfect.  It was simple to prepare  and delicious with a cup of coffee. I can’t think of a better pairing for breakfast or an afternoon snack.

This cake gets its lemony flavor from the zest of 3 lemons.  Thanks to Darcy my daughter for her help in the kitchen, as alwaysJ

Whisk eggs, sugar, salt till foamy and blended. Then add all that fragrant lemon zest!

The dry ingredients are first sifted and then whisked into the lemony egg mixture in thirds.  Next heavy cream is whisked in. and then fold in melted butter.      The cake is baked at 350 degrees in a buttered 9 x5-inch loaf pan for 50-60 minutes.  Cool 10 minutes before removing from the pan and when the cake is cooled to room temperature, it can be sliced and eaten.

A slice was perfect for me with a cup of coffee or tea. My husband traditionally enjoys pound cake toasted and served with ice cream.  So we gladly tried it.  It was delicious that way, but a word of warning- do not slice the cake too thin if you plan on toasting it because it can get too dry.   I was planning on wrapping half the cake in plastic wrap to freeze it, but we ate it up in a few days!  If you have more self-control, double wrap the cake and you can freeze it for a month!

Enjoy!


Irish Soda Bread

Standard

Our group  Tuesdays with Dorie- Baking with Julia chose  to bake  this traditional Irish Soda Bread recipe., and I am so glad we did. This bread is very easy and fast to prepare. It has only four ingredients- unbleached all-purpose flour, baking soda, buttermilk and salt.

Stir the dry ingredients with a fork in a medium bowl.

Then add the buttermilk and mix it up until the  dough comes together.   With the buttermilk, you can also add the raisins or other stir-ins that inspire you such as dried cherries, currants, craisins, orange zest, cheese, herbs….

When you turn the dough out on a floured surface, knead it gently – not too much.  Pat it into a disc.  Cut an “X” into the top

Place on a greased pan.

Bake for 50 minutes till golden brown.   Let it cool completely before slicing.

Spread on butter or cream cheese and maybe a dollop of apricot jam.

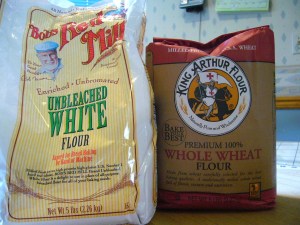
I baked this recipe twice.  The first time I wanted to add a cup of raisins and forgot to mix it in with the buttermilk.  So I baked it again on St. Patrick’s Day  and added that cup of raisins. I also used half whole wheat flour and half all-purpose flour.  Both breads were delicious, but the family favorite was the whole wheat and raisin.

Be sure to wrap any leftover bread in saran wrap and a ziplock bag.  We re-heated it the next day in the oven wrapped in aluminum foil and proceeded to finish it up for breakfast. It was still yummy!  After a couple of days the bread will be hard so if you don’t plan on eating it right away,  a  good idea would be to freeze half the bread.  When you hear it calling your name, re-heat it and enjoy! (I don’t know about you, but it isn’t easy for me to forget that there are homemade baked goods in the house!)

(And thanks to my special helper, Zoe, my clean-up crew!)

Our hosts for this recipe were Carla and Cathleen.  Visit their blogs to find the recipe. You can find everyone’s links HERE

Rugelach

Standard

I love rugelach and was really happy that our TWD (Tuesdays with Dorie) Baking with Julia group chose this recipe.  As a novice baker, I followed the recipe exactly.  So, even though my favorite combination fillings are chocolate, cinnamon and nuts, I went with the prune and apricot with raisins, nuts, and cinnamon. These rugelach are very rich.  There is a lot of cream cheese and butter in the dough, but I went for it!!

Although there are a lot of steps to follow, I spread them out over three intervals and it wasn’t too difficult.  On the first day, I made the cream cheese pastry dough which needed to chill in the refrigerator for at least 2 hours.

Later that evening, I prepared the filling ingredients.  I used a combination of toasted nuts- walnuts, pecans and almonds. I love nuts and cinnamon so I knew this was going to be very tasty!  There is also a cinnamon, sugar and nut topping which I finely processed as well.

The rest of the nuts were coarsely chopped!

These nuts were to be used for the filling along with “plumped” golden raisins and prune and apricot lekvar.  I decided to use a store bought brand as I felt that there was a lot to prepare for the rest of the recipe.

It was time to roll the rugelach!  It was a little tricky, but I got the hang of it and it was actually fun!
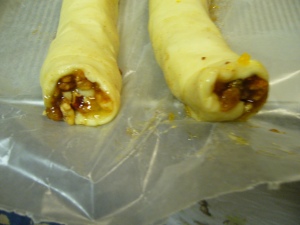
The 4 logs went into the fridge to chill overnight.

Bright and early, I sliced the dough, rolled the pieces in egg wash,
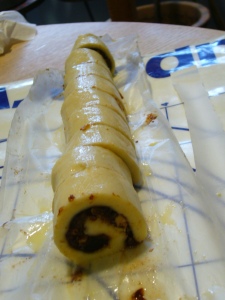
and tossed each one in the cinnamon-sugar-nut mixture.

They were ready for baking!!

Well, I made a critical mistake here and realized a few minutes into baking that I had the oven temperature too high.  This caused the first batch to get overcooked on the bottom. ( A note of caution, since the rugelach will caramelize, the recipe suggests baking them on double baking sheets.  I did not have enough baking sheets so I couldn’t do that, and with the initially high oven temperature, the bottoms did get overdone). Luckily, the rest of the rugelach came out great! My family and friends loved them!

I would like to try this recipe again and will be brave enough to experiment and use some different fillings- perhaps chocolate, raspberry, dried cranberries, maybe nutella!  I also felt that there was too much cinnamon-sugar-nut topping, so I will be less generous on the next go round and will possibly roll the log in the mixture before slicing.  It was difficult to see the beautiful spirals of the filling and I think this would remedy that!

For the recipe, please see visit our co-hosts blogs Jessica of My Baking Heart or Margaret of The Urban Hiker or purchase the book Baking With Julia written by Dorie Greenspan (pp. 325-327).
Chocolate Truffle Tartlets

Standard

I am thrilled to share my first foray into baking with the TWD (Tuesdays With Dorie ) Baking with Julia group.  Be sure to purchase the book Baking With Julia written by Dorie Greenspan to get the magnificent recipes which will be presented in this blog.  I am a novice baker and this book teaches basic techniques along with glorious photographs of the finished creations. What an amazing resource for the home baker!

If you are as crazy about chocolate as I am, you will fall for these spectacular Chocolate Truffle Tartlets.  The name says it all.  These scrumptious, intensely chocolate-y tartlets are heavenly! A dreamy filling of bittersweet chocolate combined with “bursts” of milk chocolate, white chocolate and amaretti nestled within a rich cocoa-based pastry crust!  Need I say more?  The house smelled like a chocolate factory.  It reminded me of when our family visited Wilbur’s Chocolate Factory in Lititz Pennsylvania after spending some time in Hershey and Chocolate World.  Smells surely evoke memories!  It wasn’t easy waiting until dessert to sample these.  And, the presentation!  Just add a scoop of good vanilla ice cream on a warm tartlet garnished with a strawberry.  A perfect Valentine’s Day creation! Now that is what I call

L – O – V  E !

The ingredients are assembled!

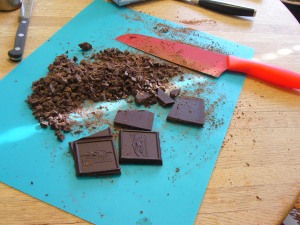
Only the best dark chocolate!

All baked!

Voila!

If you are interested in reading more about this recipe check out these blogs: Steph, Spike, Jaime and Jessica’s! Or find it on pages 382-383 of Dorie Greenspan’s Baking With Julia.